Finder / Desktop Basics

Your dock may be visible or hidden on the bottom or the left or right of your screen.

Your dock may be visible or hidden on the bottom or the left or right of your screen.

See and organize your files in the Finder on Mac

The Finder is the home base for your Mac. The Finder icon looks like a blue smiling face; click the icon in the Dock to open a Finder window.

finder-open-window-sidebar.png

See your stuff

Click items in the Finder sidebar to see your files, apps, downloads, and more. To make the sidebar even more useful, customize it. To make the Finder window even more useful, show the Preview pane.


Choose your view

You can choose how you view the items in Finder windows. For example, you don’t have to view your items in a list—Gallery view lets you flip through your files and folders visually.


Get to know the Mac desktop

At the top of the screen is the menu bar and at the bottom is the Dock. In between is what’s called the desktop. The desktop is where you do most of your work.

macos-desktop.png

You can change the look of your desktop by customizing the desktop picture and by choosing a light or dark appearance for the menu bar, desktop picture, Dock, and built-in apps.

When you open an app, its windows appear over the desktop. If your desktop is covered with windows, you can use Mission Control to see a simple view of everything that’s open so it’s easy to spot the window you need. You can also create and work in additional desktop spaces.

If you like to keep files handy on the desktop, you can use stacks to neatly group them along one side of the desktop—whenever you add a file to the desktop, it automatically goes into a stack.

Use the Dock on Mac

The Dock on the Mac desktop is a convenient place to access apps and features (like Siri, Launchpad, and the Trash) that you’re likely to use every day. The Dock can show up to three recently used apps that aren’t already in the Dock and a folder for items you download from the internet.

macos-dock.png


Teamviewer Security Settings

teamviewer-allow-accessibility-prompt.png

Background

Apple has introduced a security mechanism with macOS 10.14 (Mojave), which requires special access to be granted to remote control applications like TeamViewer. 

And macOS 10.15 (Catalina) has strengthened the security and privacy even further and requires additional permissions to be given to TeamViewer in order to control your Mac.

Without this access, TeamViewer users connecting to macOS 10.14 or higher will only be able to view the screen but not control it with their mouse or keyboard.

And TeamViewer users connecting to macOS 10.15 or higher will additionally only be able to view the desktop background and the TeamViewer app, but not any other applications at all.

These additional permissions must be granted locally on the Mac and some of them require admin rights.

How to grant access to TeamViewer on your Mac

If you're starting TeamViewer 14 or higher on your Mac running macOS 10.14 (Mojave) or higher for the first time, you will be prompted with the following dialog:

You can also open this dialog by clicking on Help --> Check system access.

You can also open this dialog by clicking on Help --> Check system access.

For the Accessibility access, you will need to click the padlock icon in the lower-left corner to make changes. You might be prompted to enter the credentials of an administrator account to continue. To navigate directly use:

Apple Menu > System Preferences > Security & Privacy
(Then choose Accessibility on the sidebar on the left.)

teamviewer-privacy-accessiblity-allow-unchecked.png

Put a check next to TeamViewer to grant it access:

teamviewer-privacy-accessibilty-allow-checked.png

Repeat the same for Screen Recording.

The permission status can be reviewed under Help -> Check system access at any time.

Use Multitasking on your iPad

With iPadOS, you can use Multitasking to work with two apps at the same time, answer emails while watching a video, switch apps using gestures, and more.


Use the Dock to work with more apps simultaneously

The Dock lets you instantly open and switch apps from any app you're in. You can even customize the left side of the Dock with your favorite apps. And on the right side, you can see apps that you recently used and apps that are open on your iPhone and Mac.

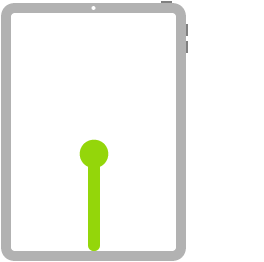
You can find the Dock at the bottom of the Home screen. To see the Dock while you're using an app, slide one finger up from the bottom edge of the screen until the Dock appears, then release. 

To customize the Dock with your favorite apps, touch and hold an app on the Home screen, then immediately drag it to the left side of the Dock.

To remove an app from the Dock, touch and hold an app on the left side of the Dock, then immediately drag it off.


Use two apps at the same time

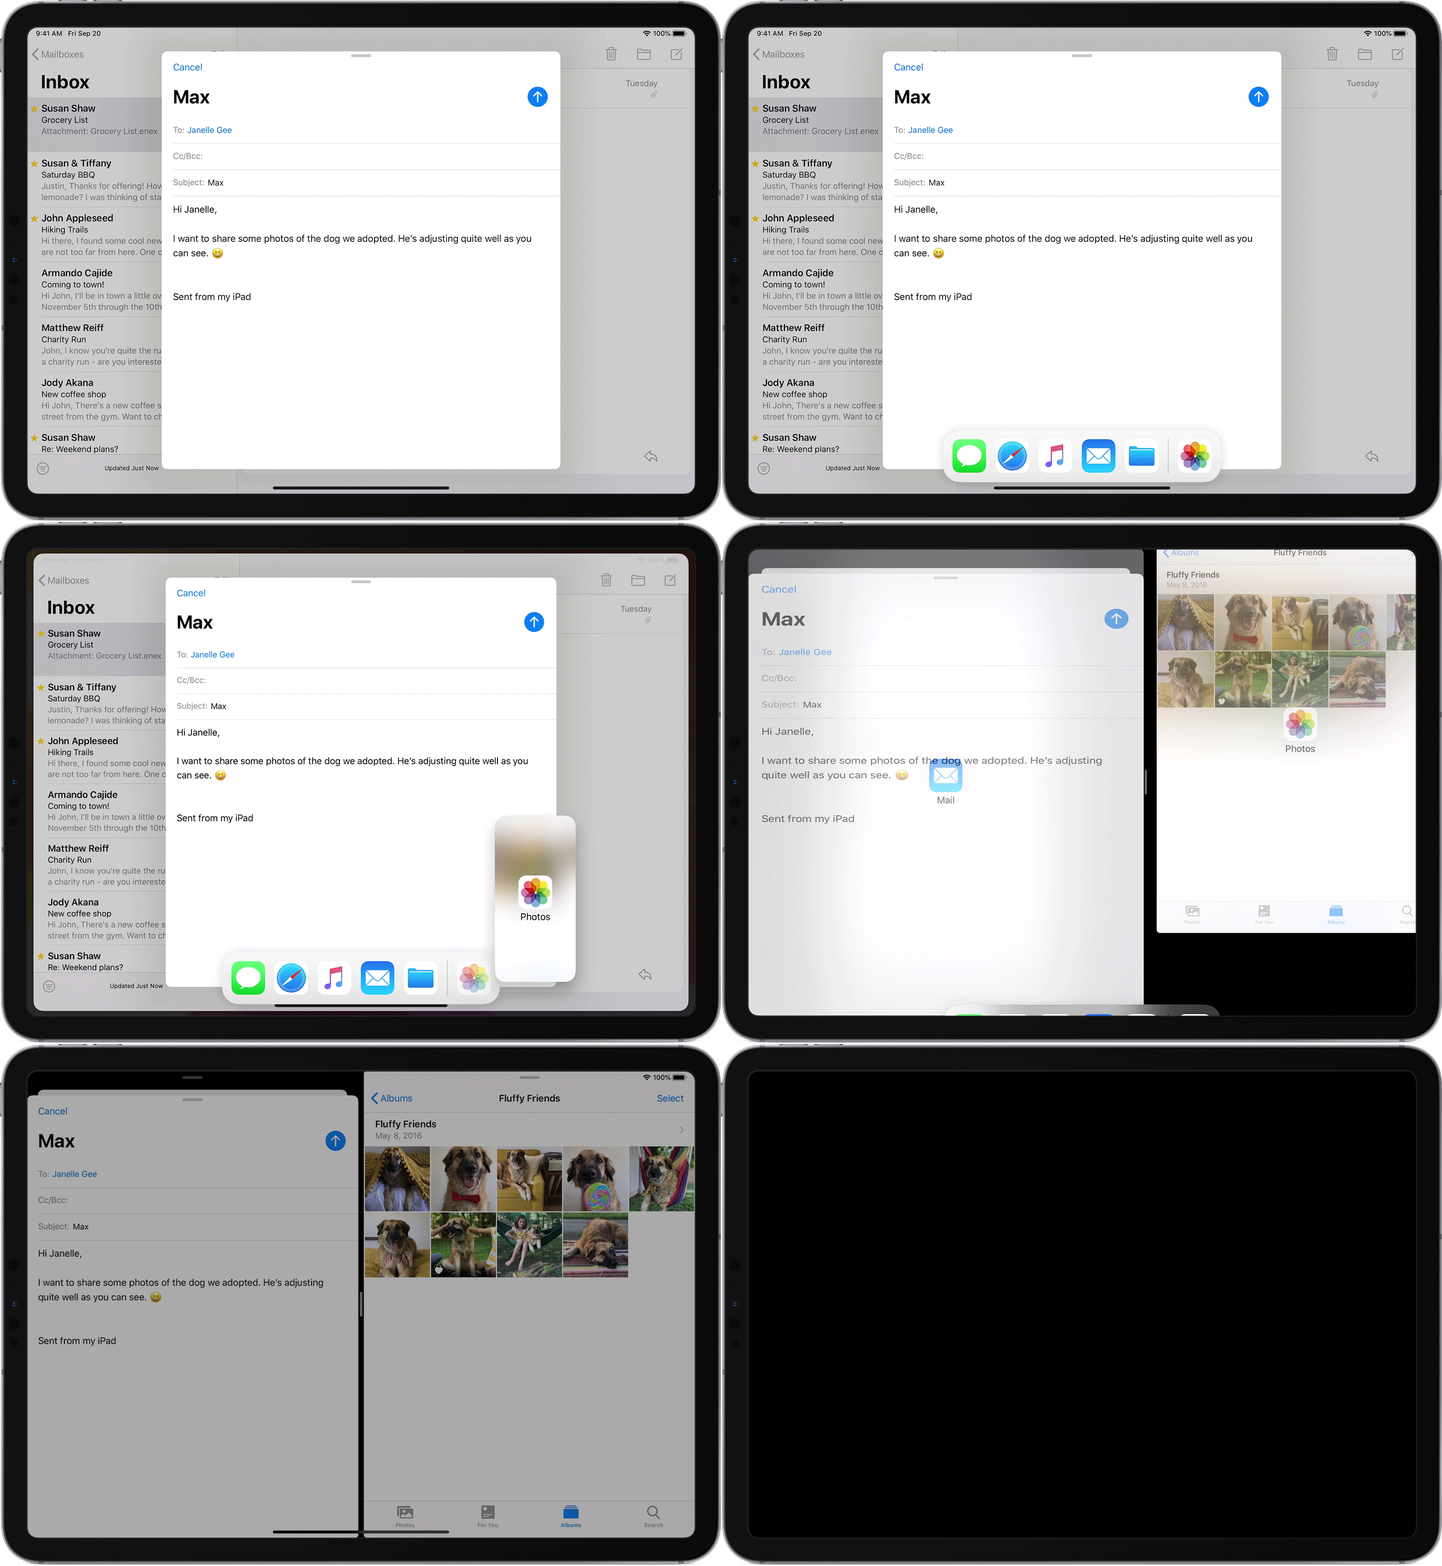
The Dock makes it easy to work with multiple apps at the same time. Drag an app out of the Dock to make a Slide Over or drag it to the right or left edge of the screen to make a Split View. You can even work on multiple apps in Slide Over, view two apps in Split View, and watch a movie or use FaceTime in Picture in Picture — all on the same screen.

Open an app with Slide Over

Open an app with Slide Over

Open an app with Slide Over

Use Slide Over to work on an app that slides in front of any open app, or even over two open apps in Split View.

How to use Slide Over:

  1. Open an app.

  2. Swipe up from the bottom of the screen to open the Dock.

  3. On the Dock, touch and hold the second app that you want to open, then drag it to the screen.

Use Slide Over in Split View:

If you're working with two apps in Split View and want to open a third app in Slide Over, just swipe up from the bottom of the screen to open the Dock. Then drag the app on top of the app divider.

  • To move the app that's open in Slide Over, touch and hold , then drag it to the left or right side of the screen.

  • You can also move the app that's open in Slide Over off the screen and slide it back when you want to use it. Just place your finger on  and drag the app to the right and off the screen. When you want to use the app again, swipe left from the right side of the screen.

  • You can work with more than one app in Slide Over when you're in Split View. To switch between apps you have open in Slide Over, swipe  to the right or left. To close an app in Slide Over, swipe up on  and hold in the middle of the screen to show all the apps you have open, then swipe up again on the app you want to close.

Some supported apps, like iWork and Files let you use Split View in the same app.

You can use Slide Over with iPad Pro, iPad (5th generation and later), iPad Air 2 and later, or iPad mini 4 and later.

Use two apps at the same time with Split View

Use two apps at the same time with Split View

Use two apps at the same time with Split View

With Split View, you can use two apps at the same time. For example, you can view photos while you compose an email. Or look at a location in Maps while you search for vacation ideas in Safari.

How to use Split View:

  1. Open an app.

  2. Swipe up from the bottom of the screen to open the Dock.

  3. On the Dock, touch and hold the second app that you want to open, then drag it off the dock to the left or right edge of the screen.

How to adjust Split View:

  • To give the apps equal space on the screen, drag the app divider to the center of the screen.

  • To turn a Split View into a Slide Over, swipe down from the top of the app.

  • To close Split View, drag the app divider over the app that you want to close.

Learn how to use Split View in Safari to see two websites at the same time on your iPad.

You can use Split View with iPad Pro, iPad (5th generation and later), iPad Air 2 and later, or iPad mini 4 and later.

Use apps while you watch a video with Picture in Picture

Use apps while you watch a video with Picture in Picture

Use apps while you watch a video with Picture in Picture

With Picture in Picture, you can do things like respond to an email while watching a TV show. If you’re using FaceTime or watching a movie, tap  and the video screen scales down to a corner of your display. Then you can open a second app and the video will continue to play. 

To move the video, drag it to another corner. To return the video to full screen, tap  on the left corner of the video. You can also hide the video by dragging it to the left or right edge of your display. Tap the arrow icon to make the video reappear.

You can use Picture in Picture with iPad Pro, iPad (5th generation and later), iPad Air 2 and later, or iPad mini 4 and later.


Use gestures with iPadOS

Use Multitasking gestures on your iPad to quickly see the app switcher, switch to another app, or return to the Home screen:

  • See the app switcher: Swipe up with one finger from the bottom edge of the screen and hold in the middle of the screen until the app switcher appears. Then swipe left or right with one finger to find and open a different app.

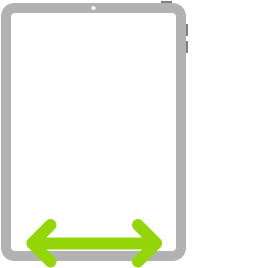
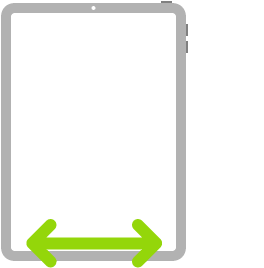
  • Switch apps: While using an app, swipe left or right with four or five fingers to switch to a previously used app. On an iPad Pro with Face ID, iPad Pro 11-inch, or iPad Pro 12.9-inch (3rd generation), swipe along the bottom edge of your screen to switch between previously used apps. 

  • Return to the Home screen: While using an app, swipe up from the bottom edge of the screen. You can also pinch five fingers together on the screen to return to the Home screen.

Drag and drop between apps

Drag and drop between apps

Drag and drop between apps

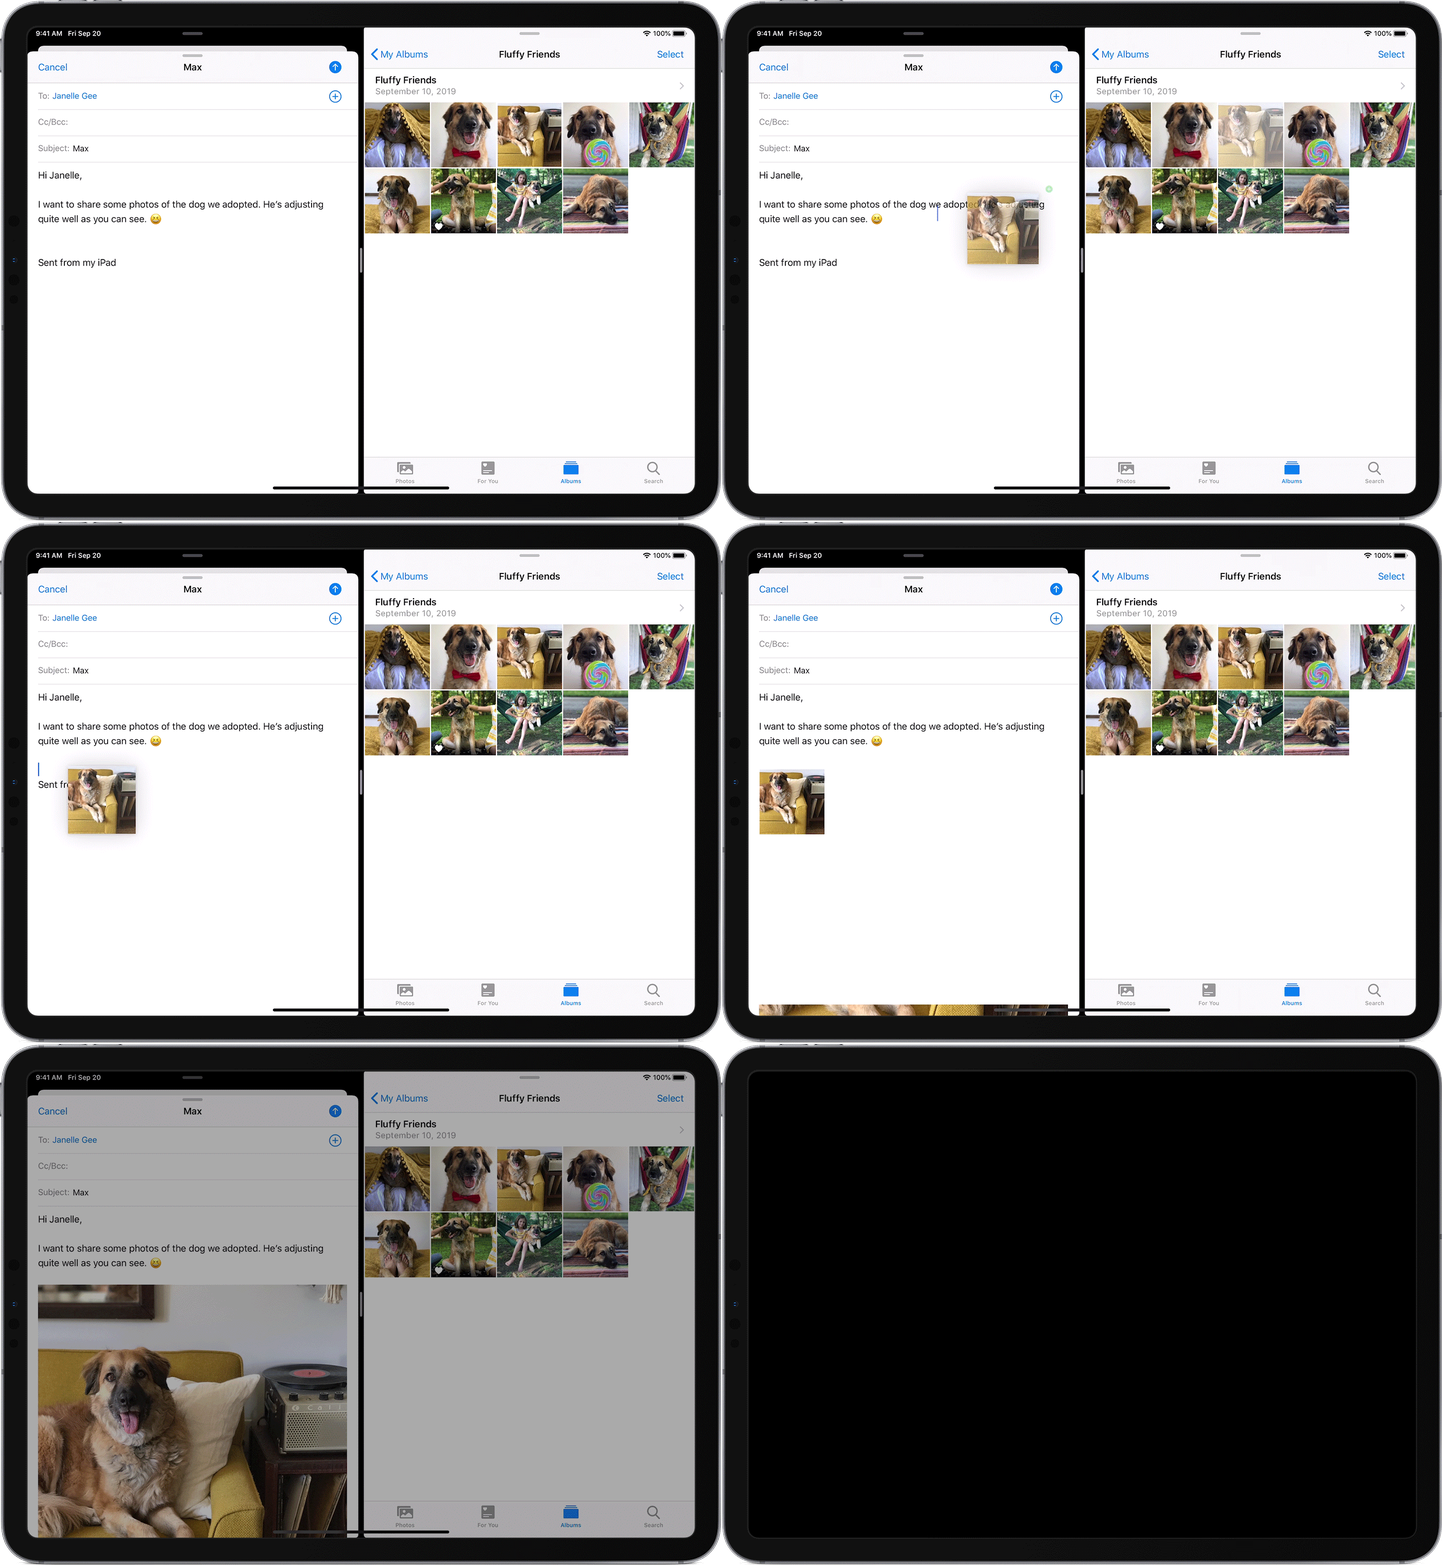
With drag and drop, you can move text, photos, and files from one app to another. For example, you can drag text from Safari into a note, an image from Photos into a an email or a calendar event into a text message:

  1. Open the two apps in Split View or Slide Over.

  2. Touch and hold the item until it lifts up. To select multiple items, touch and hold an item, drag it slightly, then continue to hold it while you tap additional items with another finger. A badge indicates the number of selected items. To drag and drop text, select the text first, then touch and hold the text until it lifts up.

  3. Drag the item to the other app and drop it.


Turn Multitasking features on or off

To turn Multitasking features on or off, go to Settings > Home Screen & Dock > Multitasking, then you can do the following:

  • Allow Multiple Apps: Turn off if you don't want to use Slide Over or Split View.

  • Picture in Picture: Turn off if you don't want to use Picture in Picture.

  • Gestures: Turn off if you don't want to use Multitasking gestures to see the app switcher, return to the Home screen, and more.

In Settings > Home Screen & Dock, you can turn on Show Suggested and Recent Apps in Dock to see recently used apps on the right side of the Dock.

iPad Gestures (Face ID models)

Learn gestures for iPad models with Face ID

Here’s a handy reference to the gestures you use for interacting with iPad Pro 11-inch and iPad Pro 12.9-inch (3rd generation and later).

Note: Many of these gestures also work on an iPad with a Home button, as indicated below.

Go Home

Go Home

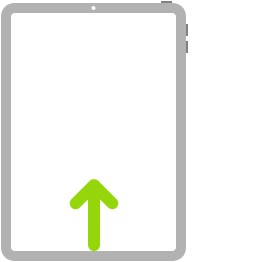
Go Home. Swipe up from the bottom edge of the screen to return to the Home screen at any time (on all iPad models). See Open apps on the iPad Home screen.

Quickly access controls

Quickly access controls

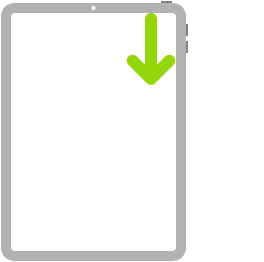
Quickly access controls. Swipe down from the top-right corner to open Control Center; touch and hold a control to reveal more options (on all iPad models). To add or remove items, go to Settings > Control Center > Customize Controls. See Use and customize Control Center on iPad.

Open the App Switcher

Open the App Switcher

Open the App Switcher. Swipe up from the bottom edge, pause in the center of the screen, then lift your finger (on all iPad models). To browse the open apps, swipe right, then tap the app you want to use. See Switch between apps on iPad.

Switch between open apps

Switch between open apps

Switch between open apps. Swipe left or right along the bottom edge of the screen to quickly switch between open apps. (On an iPad with a Home button, swipe with a slight arc.) See Switch between apps on iPad.

Open the Dock within an app

Open the Dock within an app

Open the Dock within an app. Swipe up from the bottom edge of the screen and pause to reveal the Dock (on all iPad models). To quickly open another app, tap it in the Dock. See Open an app from the Dock.

Ask Siri

Ask Siri

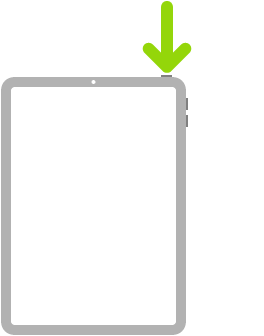
Ask Siri. Just say, “Hey Siri.” Or press and hold the top button and make your request. Siri listens until you release the button. See Ask Siri on iPad.

Use Accessibility Shortcut

Use Accessibility Shortcut

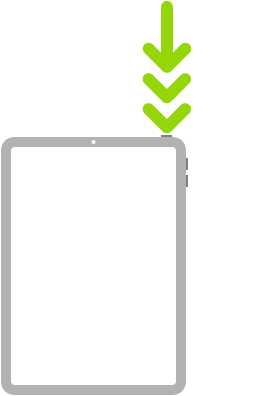
Use Accessibility Shortcut. Triple-click the top button. See Use accessibility shortcuts on iPad.

Take a screenshot

Take a screenshot

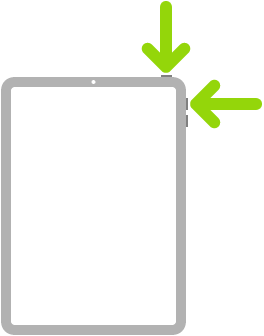
Take a screenshot. Simultaneously press and quickly release the top button and volume up button. See Take a screenshot or screen recording on iPad.

Turn off

Turn off

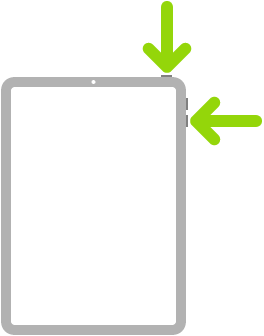
Turn off. Simultaneously press and hold the top button and either volume button until the sliders appear, then drag the top slider to power off. Or go to Settings > General > Shut Down. See Turn iPad off and on.

Force restart

Force restart

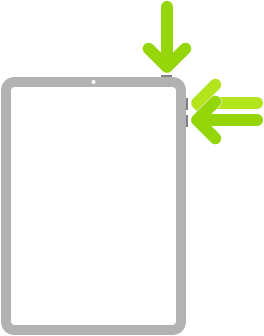
Force restart. Press and release the volume up button, press and release the volume down button, then press and hold the top button until the Apple logo appears. See Force restart iPad.

If you’re using Magic Trackpad or Magic Mouse, see Learn Magic Trackpad gestures for iPad or Use mouse devices with iPad for gestures that work on your trackpad or mouse.