Use Multitasking on your iPad

With iPadOS, you can use Multitasking to work with two apps at the same time, answer emails while watching a video, switch apps using gestures, and more.


Use the Dock to work with more apps simultaneously

The Dock lets you instantly open and switch apps from any app you're in. You can even customize the left side of the Dock with your favorite apps. And on the right side, you can see apps that you recently used and apps that are open on your iPhone and Mac.

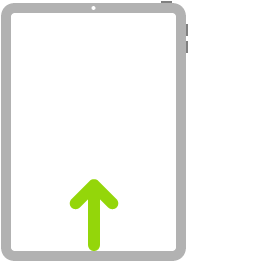
You can find the Dock at the bottom of the Home screen. To see the Dock while you're using an app, slide one finger up from the bottom edge of the screen until the Dock appears, then release. 

To customize the Dock with your favorite apps, touch and hold an app on the Home screen, then immediately drag it to the left side of the Dock.

To remove an app from the Dock, touch and hold an app on the left side of the Dock, then immediately drag it off.


Use two apps at the same time

The Dock makes it easy to work with multiple apps at the same time. Drag an app out of the Dock to make a Slide Over or drag it to the right or left edge of the screen to make a Split View. You can even work on multiple apps in Slide Over, view two apps in Split View, and watch a movie or use FaceTime in Picture in Picture — all on the same screen.

Open an app with Slide Over

Open an app with Slide Over

Open an app with Slide Over

Use Slide Over to work on an app that slides in front of any open app, or even over two open apps in Split View.

How to use Slide Over:

  1. Open an app.

  2. Swipe up from the bottom of the screen to open the Dock.

  3. On the Dock, touch and hold the second app that you want to open, then drag it to the screen.

Use Slide Over in Split View:

If you're working with two apps in Split View and want to open a third app in Slide Over, just swipe up from the bottom of the screen to open the Dock. Then drag the app on top of the app divider.

  • To move the app that's open in Slide Over, touch and hold , then drag it to the left or right side of the screen.

  • You can also move the app that's open in Slide Over off the screen and slide it back when you want to use it. Just place your finger on  and drag the app to the right and off the screen. When you want to use the app again, swipe left from the right side of the screen.

  • You can work with more than one app in Slide Over when you're in Split View. To switch between apps you have open in Slide Over, swipe  to the right or left. To close an app in Slide Over, swipe up on  and hold in the middle of the screen to show all the apps you have open, then swipe up again on the app you want to close.

Some supported apps, like iWork and Files let you use Split View in the same app.

You can use Slide Over with iPad Pro, iPad (5th generation and later), iPad Air 2 and later, or iPad mini 4 and later.

Use two apps at the same time with Split View

Use two apps at the same time with Split View

Use two apps at the same time with Split View

With Split View, you can use two apps at the same time. For example, you can view photos while you compose an email. Or look at a location in Maps while you search for vacation ideas in Safari.

How to use Split View:

  1. Open an app.

  2. Swipe up from the bottom of the screen to open the Dock.

  3. On the Dock, touch and hold the second app that you want to open, then drag it off the dock to the left or right edge of the screen.

How to adjust Split View:

  • To give the apps equal space on the screen, drag the app divider to the center of the screen.

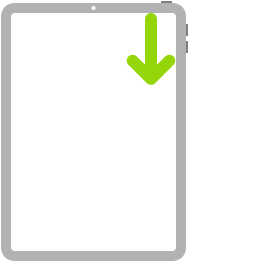
  • To turn a Split View into a Slide Over, swipe down from the top of the app.

  • To close Split View, drag the app divider over the app that you want to close.

Learn how to use Split View in Safari to see two websites at the same time on your iPad.

You can use Split View with iPad Pro, iPad (5th generation and later), iPad Air 2 and later, or iPad mini 4 and later.

Use apps while you watch a video with Picture in Picture

Use apps while you watch a video with Picture in Picture

Use apps while you watch a video with Picture in Picture

With Picture in Picture, you can do things like respond to an email while watching a TV show. If you’re using FaceTime or watching a movie, tap  and the video screen scales down to a corner of your display. Then you can open a second app and the video will continue to play. 

To move the video, drag it to another corner. To return the video to full screen, tap  on the left corner of the video. You can also hide the video by dragging it to the left or right edge of your display. Tap the arrow icon to make the video reappear.

You can use Picture in Picture with iPad Pro, iPad (5th generation and later), iPad Air 2 and later, or iPad mini 4 and later.


Use gestures with iPadOS

Use Multitasking gestures on your iPad to quickly see the app switcher, switch to another app, or return to the Home screen:

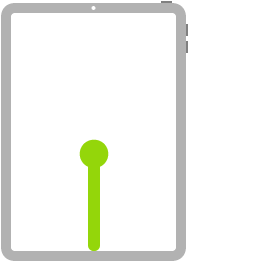
  • See the app switcher: Swipe up with one finger from the bottom edge of the screen and hold in the middle of the screen until the app switcher appears. Then swipe left or right with one finger to find and open a different app.

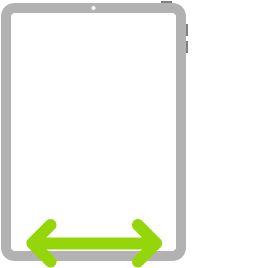
  • Switch apps: While using an app, swipe left or right with four or five fingers to switch to a previously used app. On an iPad Pro with Face ID, iPad Pro 11-inch, or iPad Pro 12.9-inch (3rd generation), swipe along the bottom edge of your screen to switch between previously used apps. 

  • Return to the Home screen: While using an app, swipe up from the bottom edge of the screen. You can also pinch five fingers together on the screen to return to the Home screen.

Drag and drop between apps

Drag and drop between apps

Drag and drop between apps

With drag and drop, you can move text, photos, and files from one app to another. For example, you can drag text from Safari into a note, an image from Photos into a an email or a calendar event into a text message:

  1. Open the two apps in Split View or Slide Over.

  2. Touch and hold the item until it lifts up. To select multiple items, touch and hold an item, drag it slightly, then continue to hold it while you tap additional items with another finger. A badge indicates the number of selected items. To drag and drop text, select the text first, then touch and hold the text until it lifts up.

  3. Drag the item to the other app and drop it.


Turn Multitasking features on or off

To turn Multitasking features on or off, go to Settings > Home Screen & Dock > Multitasking, then you can do the following:

  • Allow Multiple Apps: Turn off if you don't want to use Slide Over or Split View.

  • Picture in Picture: Turn off if you don't want to use Picture in Picture.

  • Gestures: Turn off if you don't want to use Multitasking gestures to see the app switcher, return to the Home screen, and more.

In Settings > Home Screen & Dock, you can turn on Show Suggested and Recent Apps in Dock to see recently used apps on the right side of the Dock.

iPad Gestures (Face ID models)

Learn gestures for iPad models with Face ID

Here’s a handy reference to the gestures you use for interacting with iPad Pro 11-inch and iPad Pro 12.9-inch (3rd generation and later).

Note: Many of these gestures also work on an iPad with a Home button, as indicated below.

Go Home

Go Home

Go Home. Swipe up from the bottom edge of the screen to return to the Home screen at any time (on all iPad models). See Open apps on the iPad Home screen.

Quickly access controls

Quickly access controls

Quickly access controls. Swipe down from the top-right corner to open Control Center; touch and hold a control to reveal more options (on all iPad models). To add or remove items, go to Settings > Control Center > Customize Controls. See Use and customize Control Center on iPad.

Open the App Switcher

Open the App Switcher

Open the App Switcher. Swipe up from the bottom edge, pause in the center of the screen, then lift your finger (on all iPad models). To browse the open apps, swipe right, then tap the app you want to use. See Switch between apps on iPad.

Switch between open apps

Switch between open apps

Switch between open apps. Swipe left or right along the bottom edge of the screen to quickly switch between open apps. (On an iPad with a Home button, swipe with a slight arc.) See Switch between apps on iPad.

Open the Dock within an app

Open the Dock within an app

Open the Dock within an app. Swipe up from the bottom edge of the screen and pause to reveal the Dock (on all iPad models). To quickly open another app, tap it in the Dock. See Open an app from the Dock.

Ask Siri

Ask Siri

Ask Siri. Just say, “Hey Siri.” Or press and hold the top button and make your request. Siri listens until you release the button. See Ask Siri on iPad.

Use Accessibility Shortcut

Use Accessibility Shortcut

Use Accessibility Shortcut. Triple-click the top button. See Use accessibility shortcuts on iPad.

Take a screenshot

Take a screenshot

Take a screenshot. Simultaneously press and quickly release the top button and volume up button. See Take a screenshot or screen recording on iPad.

Turn off

Turn off

Turn off. Simultaneously press and hold the top button and either volume button until the sliders appear, then drag the top slider to power off. Or go to Settings > General > Shut Down. See Turn iPad off and on.

Force restart

Force restart

Force restart. Press and release the volume up button, press and release the volume down button, then press and hold the top button until the Apple logo appears. See Force restart iPad.

If you’re using Magic Trackpad or Magic Mouse, see Learn Magic Trackpad gestures for iPad or Use mouse devices with iPad for gestures that work on your trackpad or mouse.

Best Practices for Securing Your Virtual Classroom

Zoom has helped thousands of schools and teachers around the world quickly shift to remote virtual learning, and we want all of them to have the same productive environment as their traditional classroom settings.

Zoom comes pre-stocked with numerous security features designed to control online classrooms, prevent disruption, and help educators effectively teach remotely. Here are some best practices for securing your virtual classroom using Zoom.

Lock your virtual classroom

Did you know you can lock a Zoom session that’s already started, so that no one else can join? It’s kind of like closing the classroom door after the bell. Give students a few minutes to file in and then click Participants at the bottom of your Zoom window. In the Participants pop-up, click the button that says Lock Meeting.

How to lock your classroom


Control screen sharing

To give instructors more control over what students are seeing and prevent them from sharing random content, Zoom recently updated the default screen-sharing settings for our education users. Sharing privileges are now set to “Host Only,” so teachers by default are the only ones who can share content in class.

However, if students need to share their work with the group, you can allow screen sharing in the host controls. Click the arrow next to Share Screen and then Advanced Sharing Options. Under “Who can share?” choose “Only Host” and close the window. You can also change the default sharing option to All Participants in your Zoom settings.

How to manage screen sharing

Enable the Waiting Room

The Waiting Room feature is one of the best ways to protect your Zoom virtual classroom and keep out those who aren’t supposed to be there.

When enabled, you have two options for who hits the Waiting Room before entering a class:

  1. All Participants will send everyone to the virtual waiting area, where you can admit them individually or all at once.

  2. Guest Participants Only allows known students to skip the Waiting Room and join but sends anyone not signed in/part of your school into the virtual waiting area.

The virtual Waiting Room can be enabled for every class (in your settings) or for individual classes at the scheduling level. 

Update: Starting March 31, the Waiting Room feature will be automatically turned on by default. Visit our support page for more information on adjusting your Waiting Room settings.

How to enable the Waiting Room

Lock down the chat

Teachers can restrict the in-class chat so students cannot privately message other students. We’d recommend controlling chat access in your in-meeting toolbar controls (rather than disabling it altogether) so students can still interact with the teacher as needed.

How to control chat access

Remove a participant

If someone who’s not meant to be there somehow manages to join your virtual classroom, you can easily remove them from the Participants menu. Hover over their name, and the Remove option (among other options) will appear. Click to remove them from your virtual classroom, and they won’t be allowed back in.

How to remove a participant

Security options when scheduling a class

The cool thing about Zoom is that you have these and other protection options at your fingertips when scheduling a class and before you ever have to change anything in front of your students. Here are a few of the most applicable:

  • Require registrationThis shows you every email address of everyone who signed up to join your class and can help you evaluate who’s attending.

  • Use a random meeting ID: It’s best practice to generate a random meeting ID for your class, so it can’t be shared multiple times. This is the better alternative to using your Personal Meeting ID, which is not advised because it’s basically an ongoing meeting that’s always running.

  • Password-protect the classroomCreate a password and share with your students via school email so only those intended to join can access a virtual classroom.

  • Allow only authenticated users to join: Checking this box means only members of your school who are signed into their Zoom account can access this particular class.

  • Disable join before hostStudents cannot join class before the teacher joins and will see a pop-up that says, “The meeting is waiting for the host to join.“

  • Manage annotation: Teachers should disable participant annotation in the screen sharing controls to prevent students from annotating on a shared screen and disrupting class.

Note: For schools scheduling classes through an LMS, some of these settings might appear a little differently. Visit support.zoom.us if you need assistance.

Additionally, teachers have a couple in-meeting options to control your virtual classroom:

  • Disable video: Turn off a student’s video to block distracting content or inappropriate gestures while class is in session.

  • Mute students: Mute/unmute individual students or all of them at once. Mute Upon Entry (in your settings) is also available to keep the clamor at bay when everyone files in.

  • Attendee on-hold: An alternative to removing a user, you can momentarily disable their audio/video connections. Click on the attendee’s video thumbnail and select Start Attendee On-Hold to activate.

Important recommendation for teachers

Teachers: We encourage you to NOT post pictures of your virtual class on social media or elsewhere online. While it’s fun to share in the excitement of connecting over Zoom, we are particularly committed to protecting the privacy of K-12 users and discourage publicly posting images of students, especially minors, in a Zoom virtual classroom.

Get Zooming securely

You can also check out this video on securing your virtual classroom from the Zoom team:


Additionally, we’ve compiled several great resources to help teachers and administrators — even the most technology-challenged ones — get quickly trained on Zoom and pick up some best practices for educating over Zoom

We invite you to learn about the additional benefits Zoom’s Education plan can provide for virtual learning and remote education.

Reset SMC on computers that have the T2 chip

2018-macbook-air-keyboard-diagram-smc.png

Resetting the system management controller (SMC) can resolve certain issues related to power, battery, and other features.

The SMC is responsible for managing behaviors related to the following features. If you're experiencing issues with any of these, you might need to reset the SMC. 

  • Power, including the power button and power to the USB ports

  • Battery and charging

  • Fans and other thermal-management features

  • Indicators or sensors such as status indicator lights (sleep status, battery charging status, and others), the sudden motion sensor, the ambient light sensor, and keyboard backlighting

  • Behavior when opening and closing the lid of a notebook computer

Notebook computers with the T2 chip

Before resetting the SMC, try these steps:

  1. Shut down your Mac.

  2. Press and hold the power button for 10 seconds, then release the button.

  3. Wait a few seconds, then press the power button to turn on your Mac.

If the issue persists, follow these steps to reset the SMC:

  1. Shut down your Mac.

  2. On your built-in keyboard, press and hold all of the following keys. Your Mac might turn on.

    • Control  on the left side of your keyboard

    • Option (Alt)  on the left side of your keyboard

    • Shift  on the right side of your keyboard

  3. Keep holding all three keys for 7 seconds, then press and hold the power button as well. If your Mac is on, it will turn off as you hold the keys.

  4. Keep holding all four keys for another 7 seconds, then release them.

  5. Wait a few seconds, then press the power button to turn on your Mac.

Desktop computers with the T2 chip

  1. Shut down your Mac, then unplug the power cord.

  2. Wait 15 seconds, then plug the power cord back in.

  3. Wait 5 seconds, then press the power button to turn on your Mac.