Smart Folders in Apple Mail

Smartfolders allow you to chunk your email into views by criteria that you deem most useful. It’s like a speadsheet formula for your email. -rws

Create Smart Mailboxes

  1. Go to the Mail app on your Mac.

  2. Choose Mailbox > New Smart Mailbox.

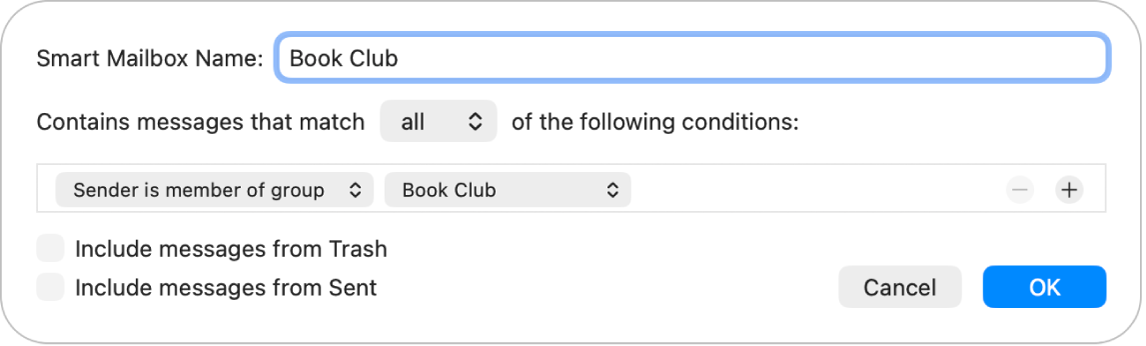
  3. Enter a name for the Smart Mailbox.

  4. Specify the criteria.

Set the first condition: Click the first pop-up menu, choose an option (such as From, Subject, or “Sender is member of group”), then complete the condition using the other menus or fields that are shown (they vary depending on your choice in the first pop-up menu).

For example, if you chose From, you can choose “contains” or “begins with” in the second pop-up menu, then enter a sender’s name in the text field. If you chose “Sender is member of group” in the first pop-up menu, you can choose a group name in the second pop-up menu.

  • Add or remove conditions: To set additional conditions, click . To remove a condition, click .

  • Set the scope of multiple conditions: If you have at least two conditions, a pop-up menu appears that lets you choose whether an email must meet any or all of the conditions to be included in the Smart Mailbox.

  • Include messages from the Trash or Sent mailbox: Select the checkbox to include emails that are in those mailboxes in your Smart Mailbox.

  1. Click OK.

    Whenever you select your Smart Mailbox in the sidebar, emails that match its criteria are listed.

To delete a Smart Mailbox, select it, then choose Mailbox > Delete Mailbox. The emails that were listed when you viewed the Smart Mailbox aren’t deleted.
AirPod Wireless Charging Compatibility

Charge your case wirelessly

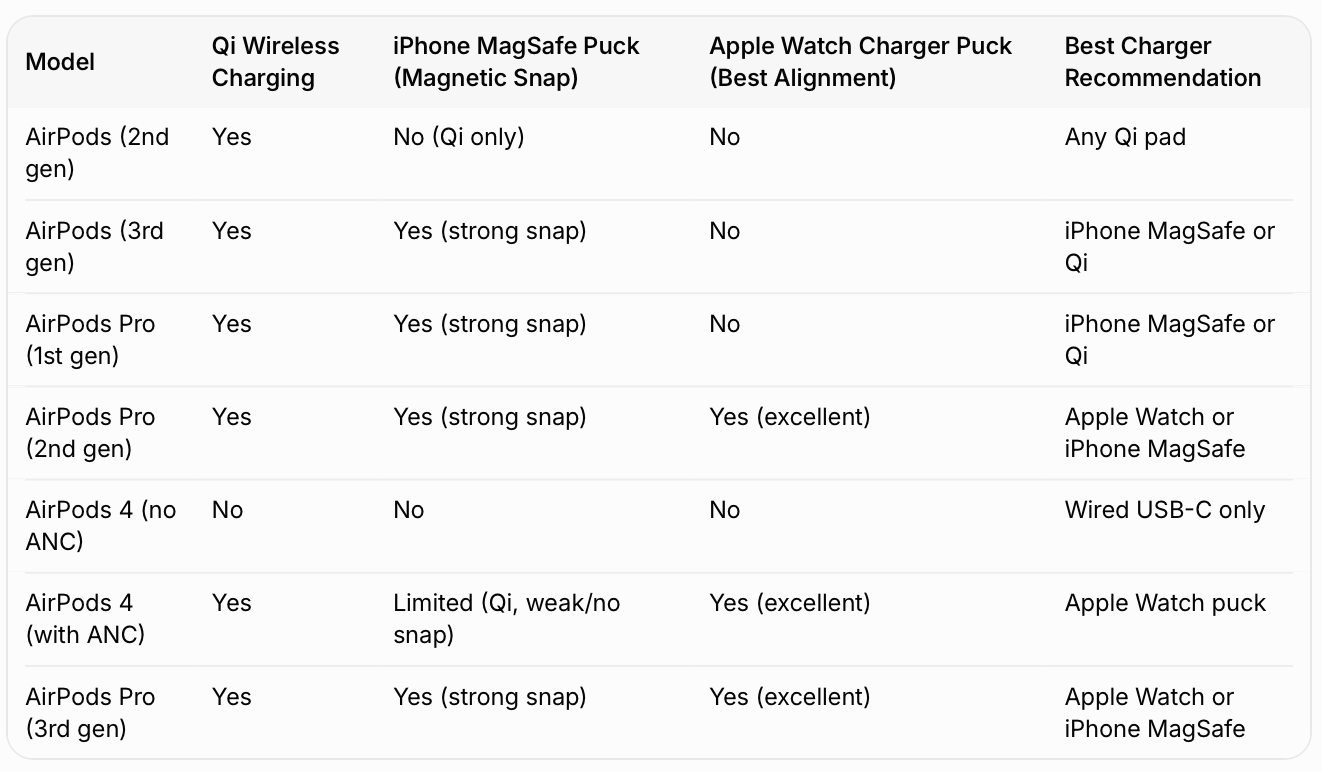
  • To charge your MagSafe Charging Case or Wireless Charging Case with a Qi-certified charging mat or MagSafe charger, place your case on the charger with the status light facing up and with the lid closed. The status light should show the current charge level for 8 seconds. If you have AirPods Pro 1, AirPods Pro 2, AirPods Pro 3, AirPods 3 or AirPods 4 (ANC), you can tap the case when it's on the charging mat to determine whether your AirPods are charging (amber light) or fully charged (green light).

  • To charge your MagSafe Charging Case (Lightning or USB-C) for AirPods Pro 2, your MagSafe Charging Case for AirPods Pro 3, or your Wireless Charging Case for AirPods 4 (ANC) with an Apple Watch charger, place your case on the charger with the status light facing up and with the lid closed. The status light should show the current charge level for 8 seconds. With the Wireless Charging Case for AirPods 4 (ANC), make sure to center the case flat on the charger.

Mac Studio Dust Bunnies

Official Apple Cleaning Instructions (Direct from Support)

From Apple's "How to clean your Apple products" and the Mac Studio Important Handling Information:

  1. Shut down your Mac Studio completely.

  2. Unplug the power cord and all other cables/devices.

  3. Use a damp, soft, lint-free cloth to wipe the exterior surfaces.

    • Avoid getting any moisture in the openings (vents).

    • Do not spray liquids directly on the computer.

    • Do not use aerosol sprays, solvents, abrasives, cleaners containing hydrogen peroxide, or alcohol-based cleaners on the main body (unless for specific approved surfaces like certain wipes on hard nonporous areas).

Apple does not publish a dedicated internal dust removal procedure for the Mac Studio because the cooling system (intake from bottom, exhaust from rear/sides) is intended to be maintained externally.

Community-Approved & Commonly Accepted Self-Service Method (Widely Endorsed in Apple Discussions)

The most frequently recommended and safe user action, echoed across Apple Support Communities:

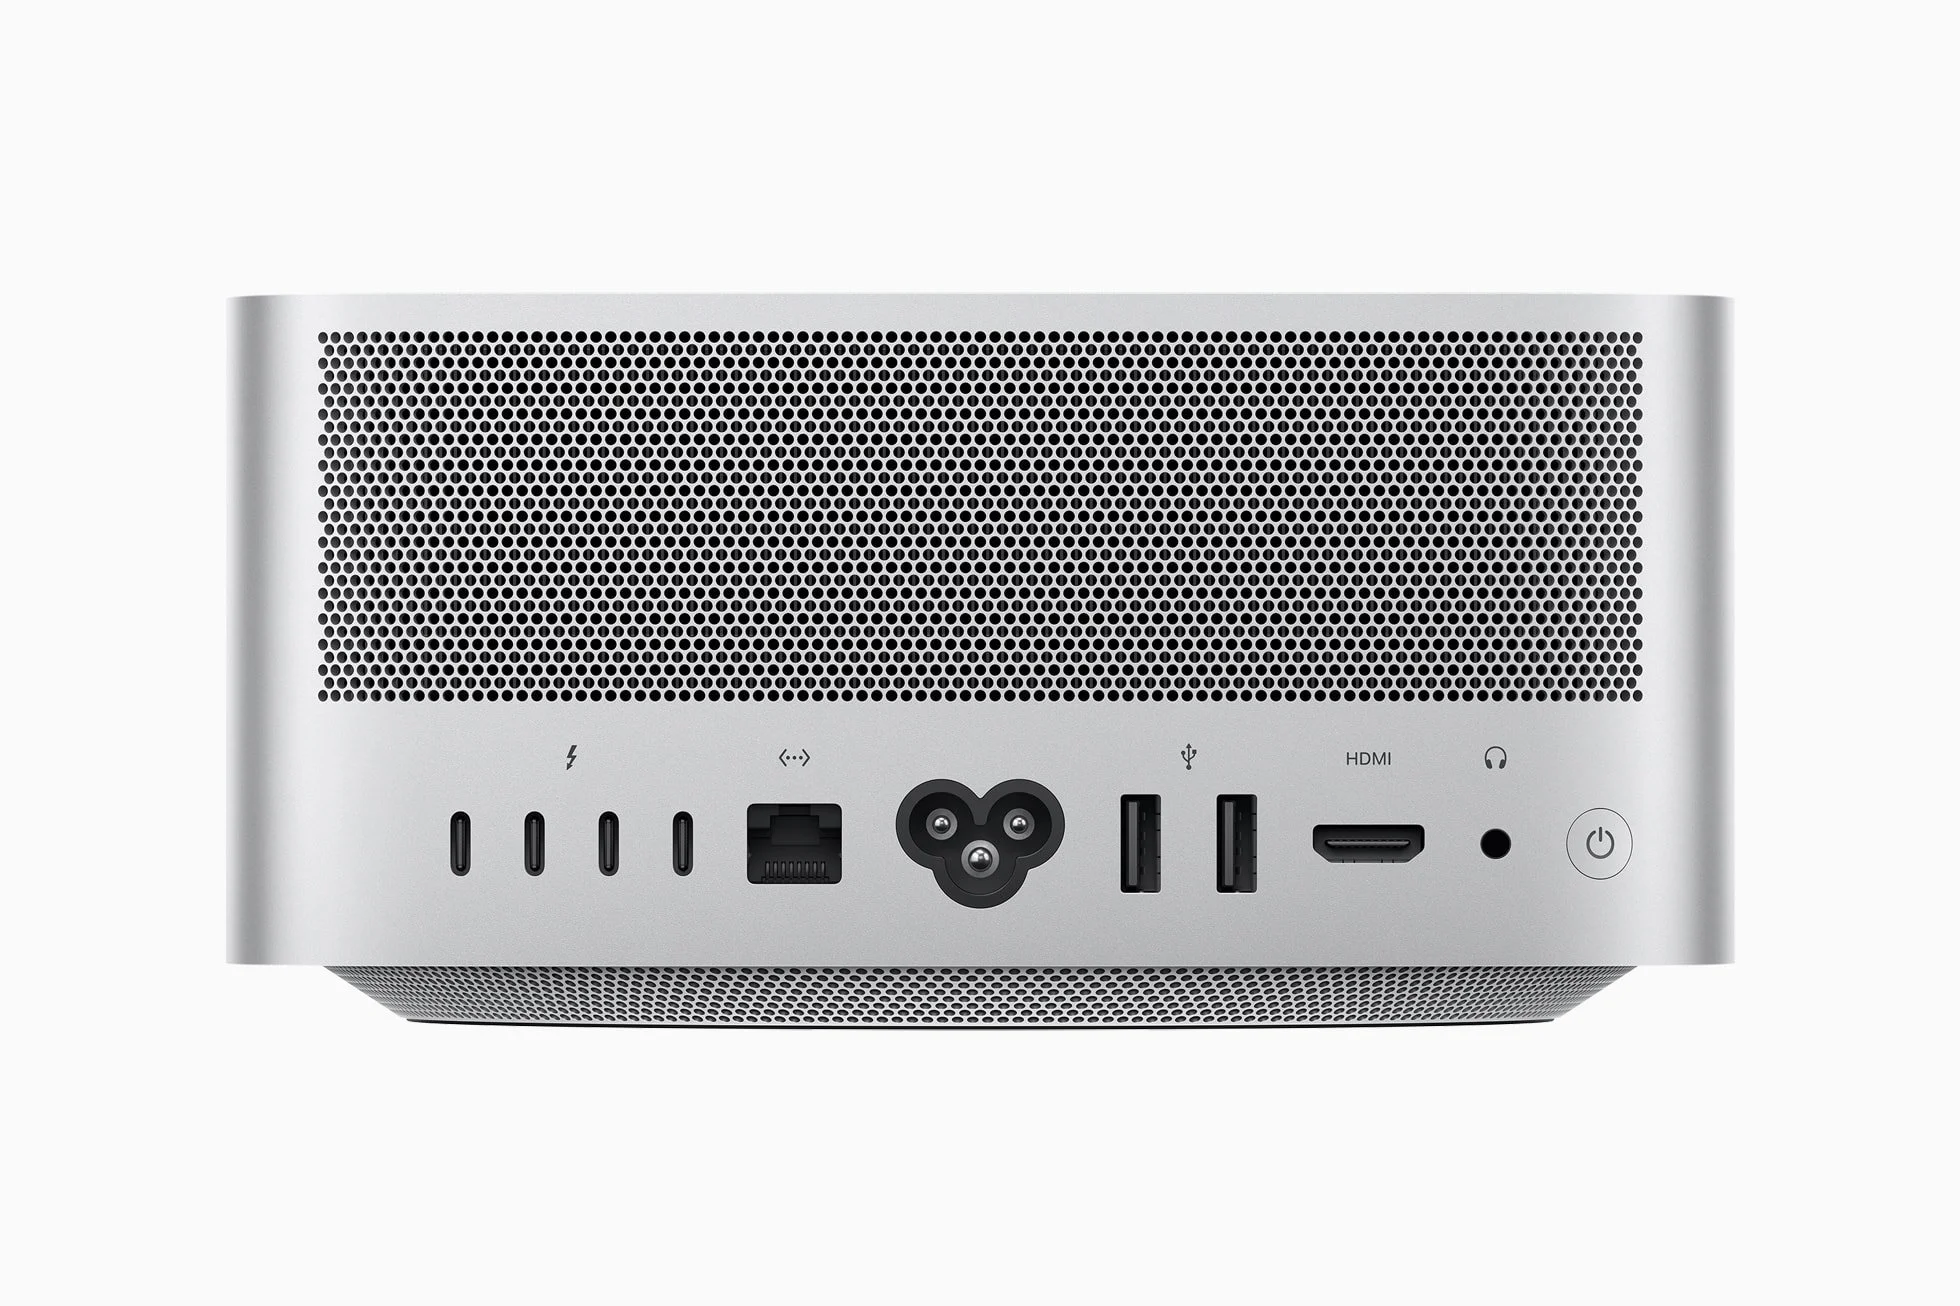
  • After powering down and unplugging everything, gently vacuum the intake vents (bottom) and exhaust vents (rear/sides) using a household vacuum with a soft brush or crevice tool attachment.

  • Hold the nozzle slightly away from the vents and move it around to draw dust outward.

  • You may use a clean, soft anti-static brush (e.g., camera lens brush) to lightly agitate surface dust while vacuuming.

Key warnings from Apple-aligned advice:

  • Never blow compressed air into the vents while the unit is assembled — this can drive dust deeper into the heatsink and internal components rather than removing it.

  • Do not run the fans at high speed as a cleaning method (as discussed previously — it risks pulling in more dust or redistributing particles internally).

  • Avoid any disassembly (removing the bottom rubber foot/ring, etc.) as this is not user-serviceable and may affect seals or void aspects of warranty if damage occurs.